For this tutorial you’re not working from a photo. You’re going to work on an imaginary cat creation.
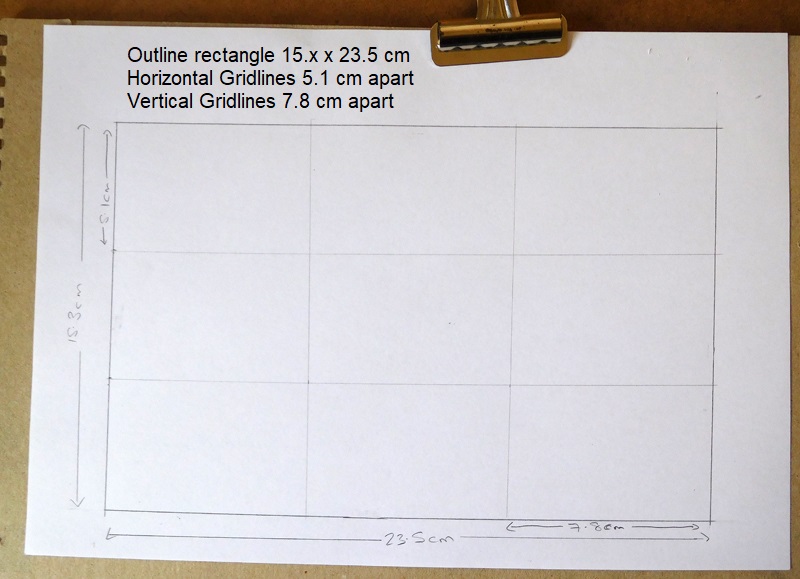
You’re going to work on an A4 piece of Paper but your image will fit into a standard A4 mount so we’ll work in the middle of the paper to an aperture size of 15.3cm x 23.6 cm.
Draw a rectangle in the middle of the paper 23.6 cm wide and 15.3 cm height
You’re going to use a 3 x 3 grid to help with the layout. So mark in your box 2 horizontal lines with a measurement of 5.1cm between them and 2 vertical lines with a measurement of 7.8cm between them
Mark out the grid on your paper as described. Don’t be heavy handed with the grid lines as you’ll want to remove the marks as we start to fill the outline the drawing.
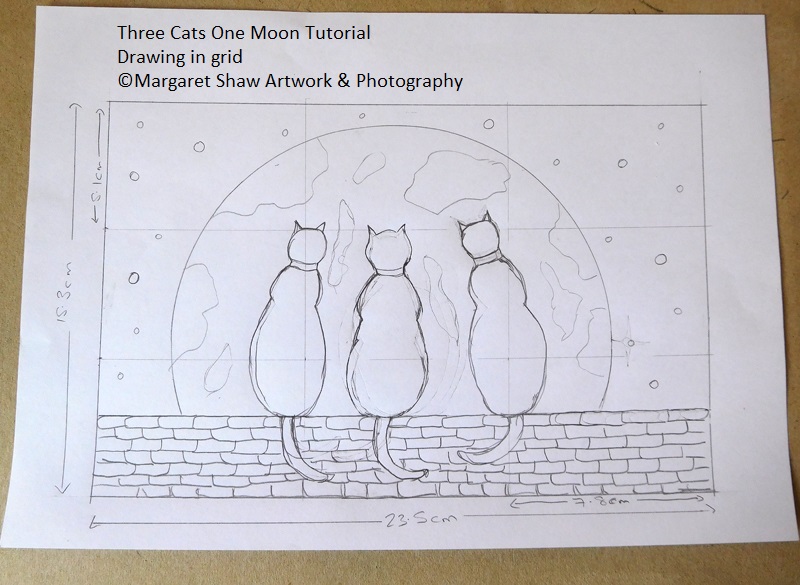
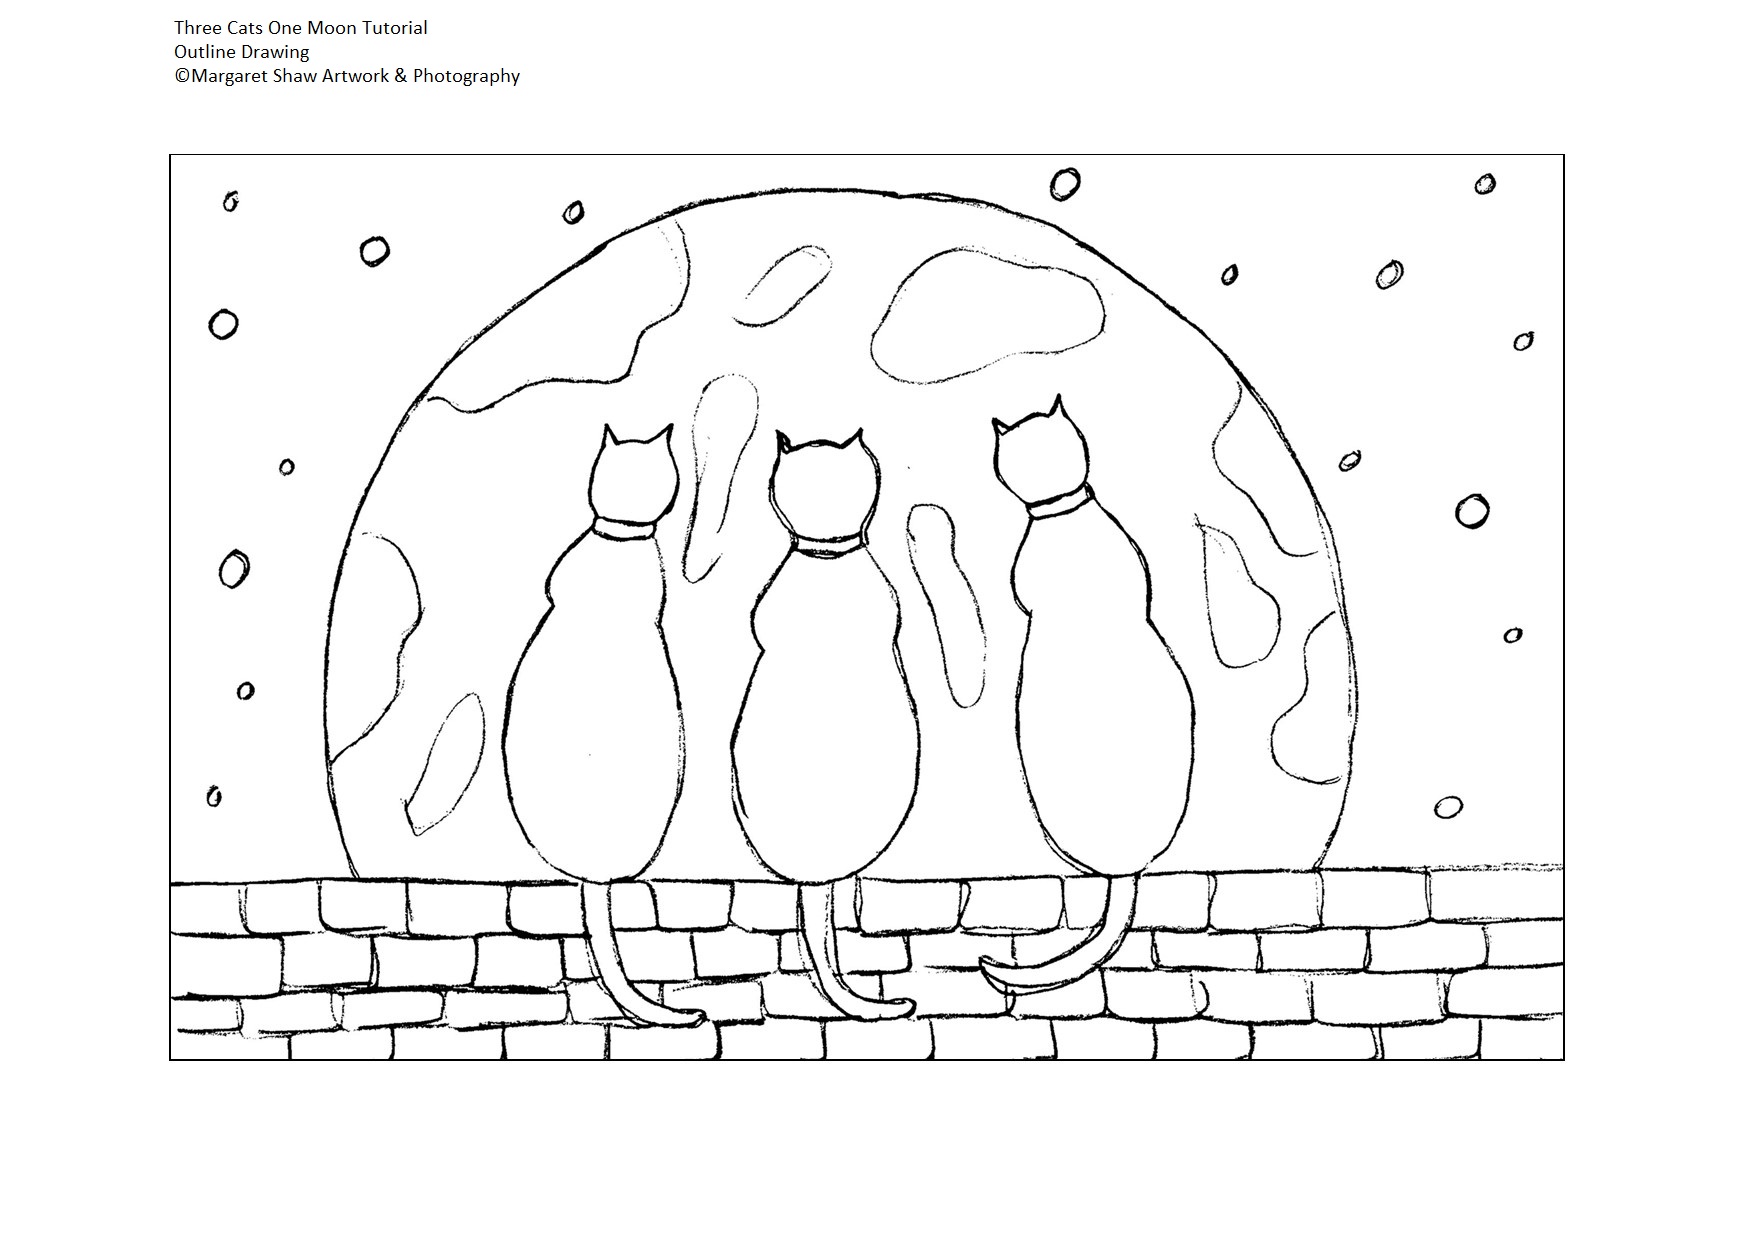
Using the grid as a guide draw the outlines of the picture. Don’t draw the outlines to heavily. If you make a mistake you can erase them.
The grid lines help us position things:
- The top of the wall is ½ way up the bottom grid.
- The moon starts in the middle of each of the ends of the horizontal grids. I used a small plate to draw round to get a circle for the moon.
- The cats are positioned on left and right vertical gridlines and the middle cat is in the centre of the image.
You can see on the finished image that I changed my mind about the wall and made the individual stones bigger and rounder. If you prefer them smaller, then leave them small. You may want to personalise your picture more:
- You could change the shape of the cats for example have them leaning all the same way.
- Maybe just have 2 cats?
- The moons shaded areas are round the cats – put your own shaded areas wherever you’d like – maybe have a look at some pictures of the moon to get something realistic.
- Again on the finished image you can see that I removed the shaded areas between the cats.
- There are stars dotted in the sky – keep these random and different sizes or you may prefer not to have any stars.
If you’re not happy with a line, then draw in the new line before erasing the old one. Experience has shown that if you erase the incorrect line first you’re likely to re-draw it exactly the same way.
I sometimes find it helpful to drawn on the reference image to give myself a feel for where things are going. Here's the link to the finished image that you can download and print at A4.
The next stage is to remove the grid lines so you have the outline scene to fill in (I did say don’t be heavy handed with the grid). If you have been heavy handed with the grid – trace your drawing and transfer it onto a fresh piece of paper.
Here’s a link to the outline drawing that you can print then trace. By tracing something you are still drawing and with more experience you’ll trace less and less. As stated earlier you can make any changes to the image that you like.
.jpg?timestamp=1588349452902)
Before you start to fill in the picture, a little practice. You need to be able to create a range of tones with your pencil.
On a spare piece of paper draw a grid (mine’s 1cm squares). Then see how many tones you can get from your pencil. Use the lightest touch to draw the lightest grid and at the other end press on hard to get the darkest grid
.jpg?timestamp=1588349498133)
Here’s my attempt – not too many tones but enough to give me a range.
If you have pencils with different leads than you can get a wider range. H pencils give the lightest tones and B pencils give the darkest tones. But, as with this exercise, you can get a range with just the one pencil.

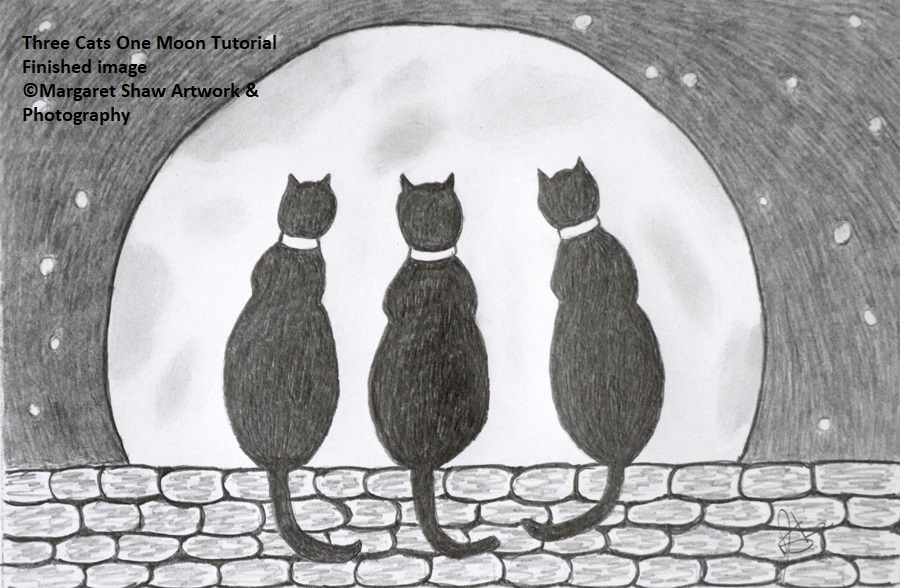
To help throughout your drawing, I suggest you view on screen or download / print the finished piece.
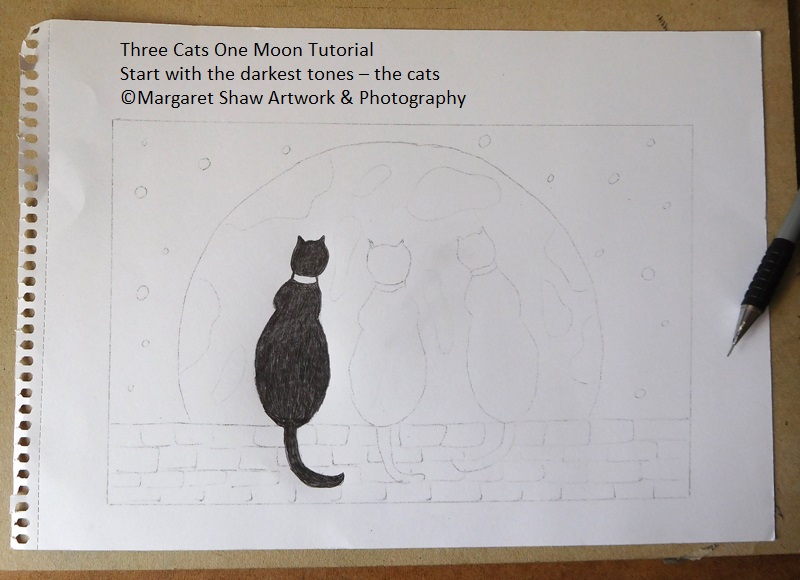
You’ll start with the darkest tones which are the cats – so then you know that everything else is going to be lighter.
You need to press the pencil hard to get the darkest tones and work with small pencil strokes to obliterate the white paper. Make sure that you leave the collar white. You will need to put an outline on the edge of the collar otherwise you’ll look like you have the cats head floating separately from the body.
I started at the left cat and worked from left to the right as I am right handed – this will help prevent smudging of completed work. If you’re left handed, start on the right cat and work to the left.
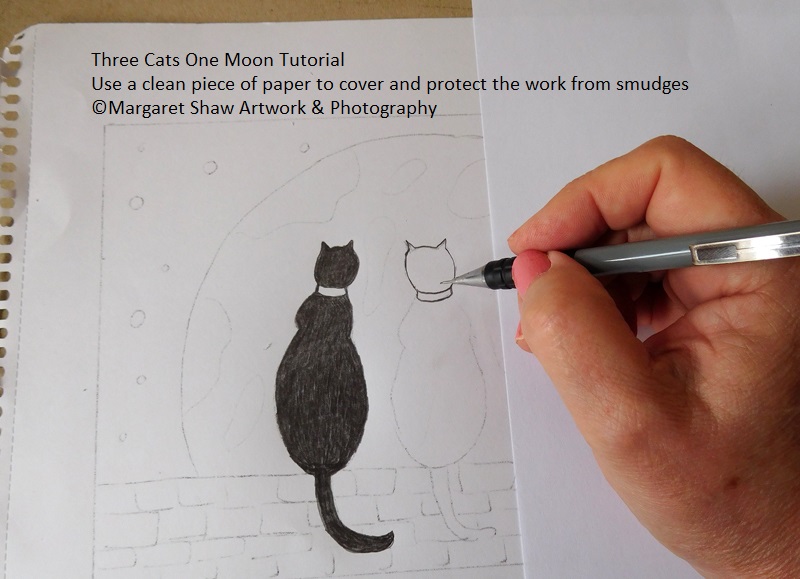
As I was working the first cat, I realised that I was already smudging the outline drawing and getting dirty marks on the paper. We want that moon to be pure white, so I suggest you put a clean piece of paper under your hand on top of the work to protect everything.
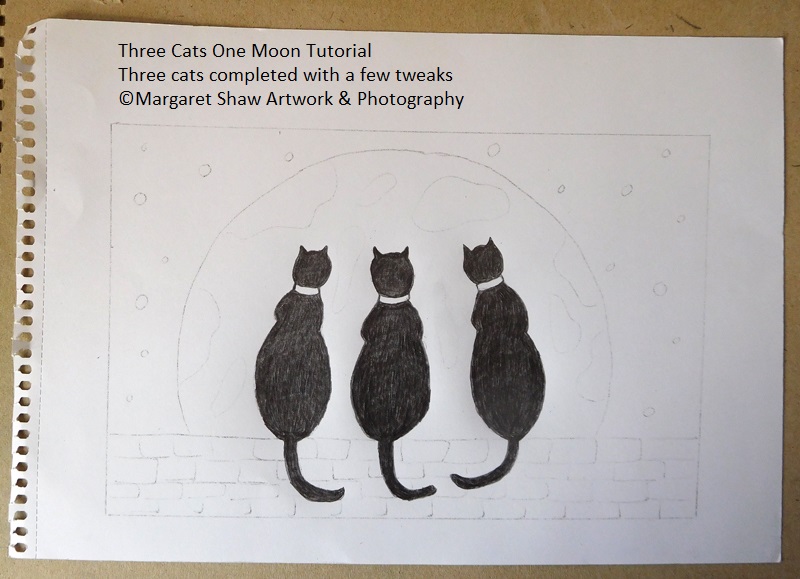
Complete the three cats. As you are working you may need to refine your outline – I made the tails a little longer and the heads a little rounder.
The next step is the sky. Or you may want to take a break before starting that. One of the advantages of pencil work is that you can leave for as long as necessary. There’s no paint or anything to spoil. That is unless a family member or a pet decides that they would like to help.
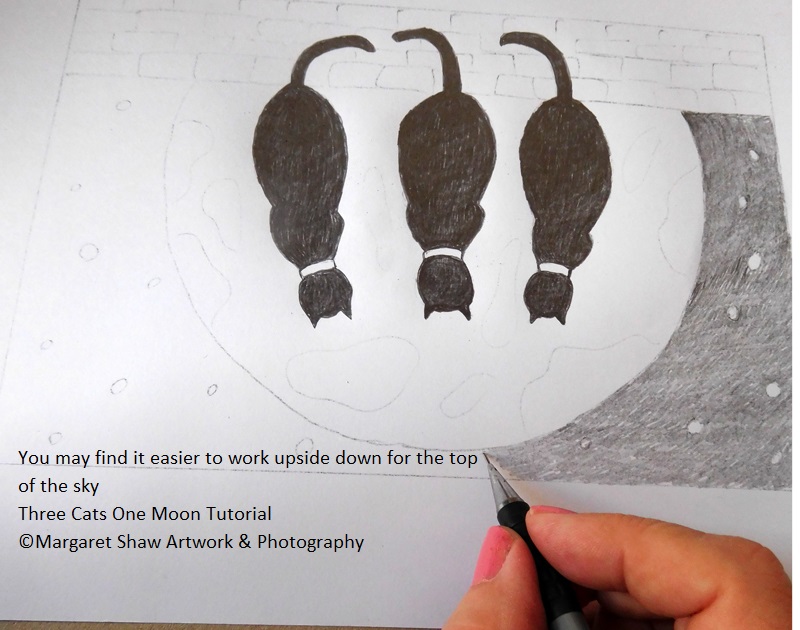
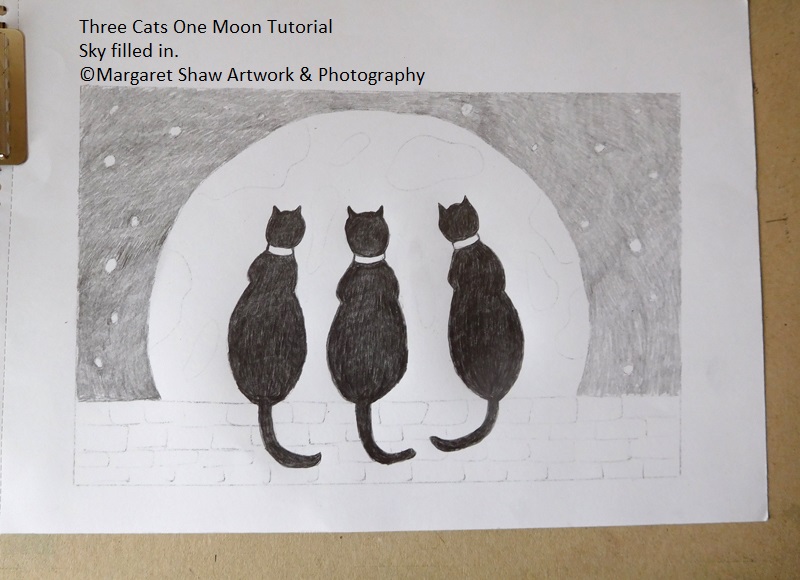
You don’t want the sky as dark as the cats so need to lighten the pencil strokes. But you do want to cover the white paper – except for the stars. Still with small pencil marks that follow the roundness of the moon, fill in the sky, working round the stars. As you get to the top of the picture, rather than lean over the cats, you may find it easier to work upside down.
There’s quite allot of sky to complete do take a break and stretch your arm periodically.
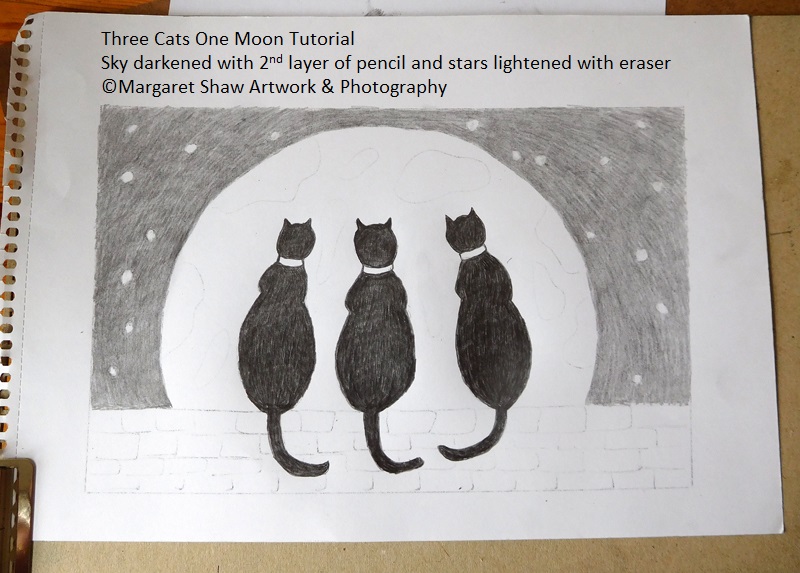
If, after filling in the sky, you think it’s not dark enough, then go over the area again. Because there is already pencil down the 2nd layer goes on easier than the first layer and you can lengthen the pencil strokes.
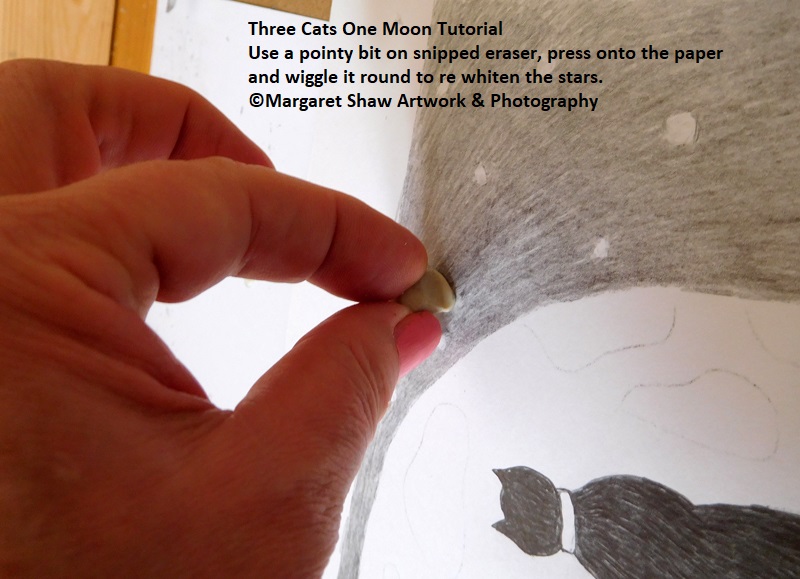
In the process of filling in the sky you may obliterate a few stars. To get them back, snip a small piece off your eraser. Find a pointy bit on your slither press onto the paper and wiggle it round. You may find that the eraser gets dirty doing this, so rub the eraser on a clean piece of paper. This will lift the pencil off the eraser and you’ve a clean bit to back to your stars with.
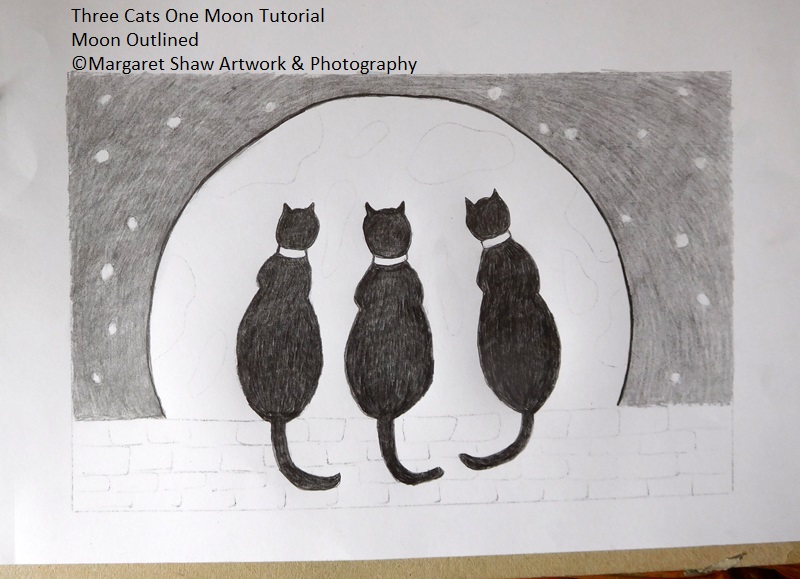
If you’d like to, outline the moon. Use a steady hand press on hard and if you do slip – remember that slither of clean eraser.
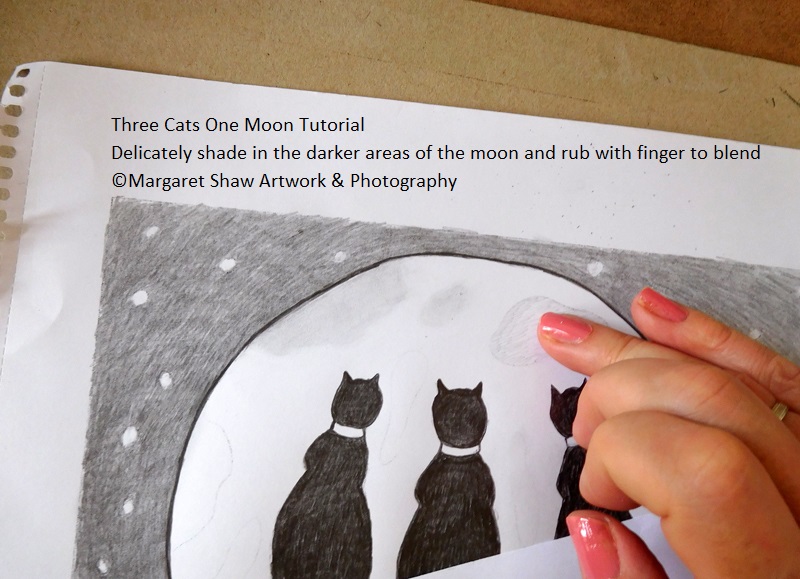
Onto the shaded areas of the moon.
You fill them in with the lightest of shading and then use your finger to blend the shading. You’ll probably have the guide line remaining so get that clean slither of eraser and remove it.
Or
Erase the line first, shade the area and blend.
Have a play on a separate piece of paper to see what works best for you.
Whichever method you choose, please take care not to smudge the cats ( remember that piece of paper to protect the work ).
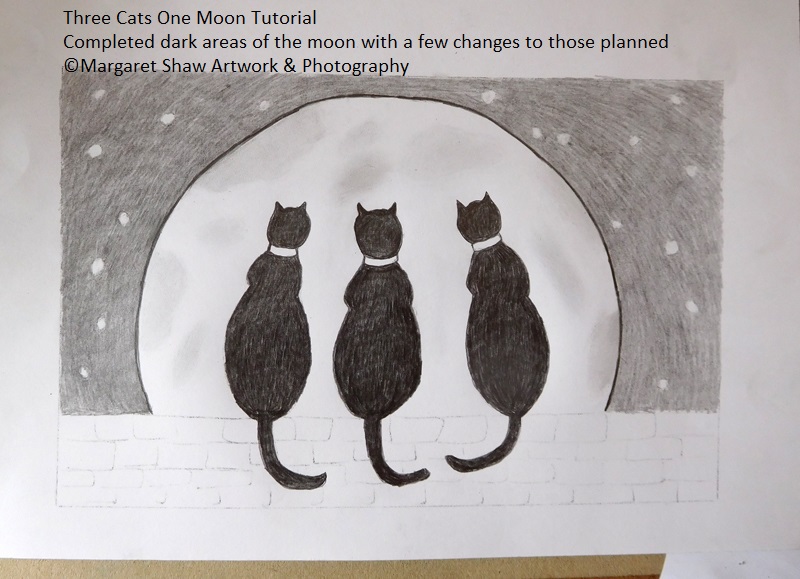
I decided at this point that I didn’t like the moon markings between the cats so took those out with the eraser.
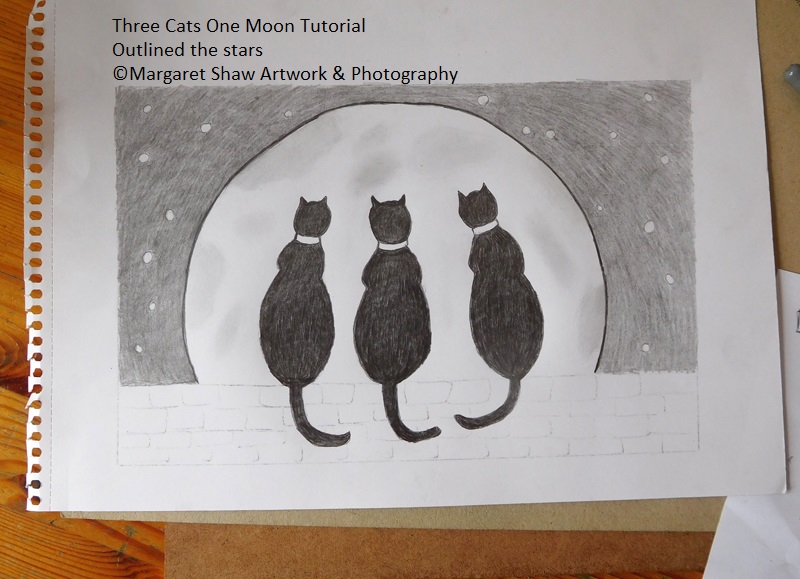
Before starting on the wall, I decided that if the moon was outlined, the stars could also be outlined. Not quite as distinct as the moon – again this is a matter of choice.
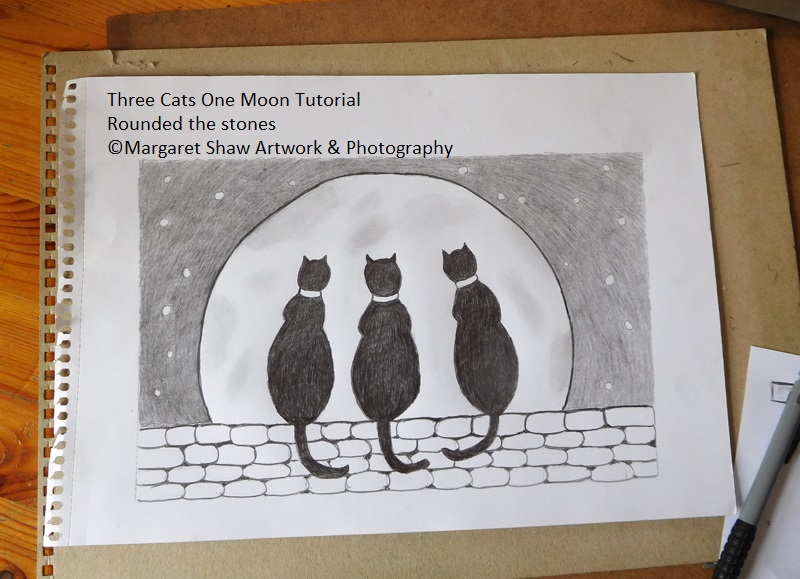
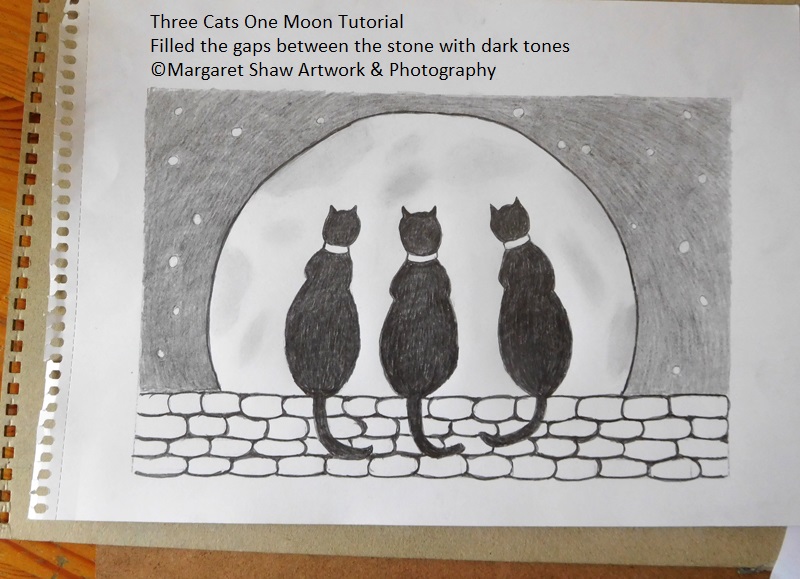
Staying with the idea of outlining this is the point I decided to make the stones more oval and outlined. Drew in the revised shape with rounded corners and filled in the gaps between them darkly.
If you prefer leave them square and outline them darkly.
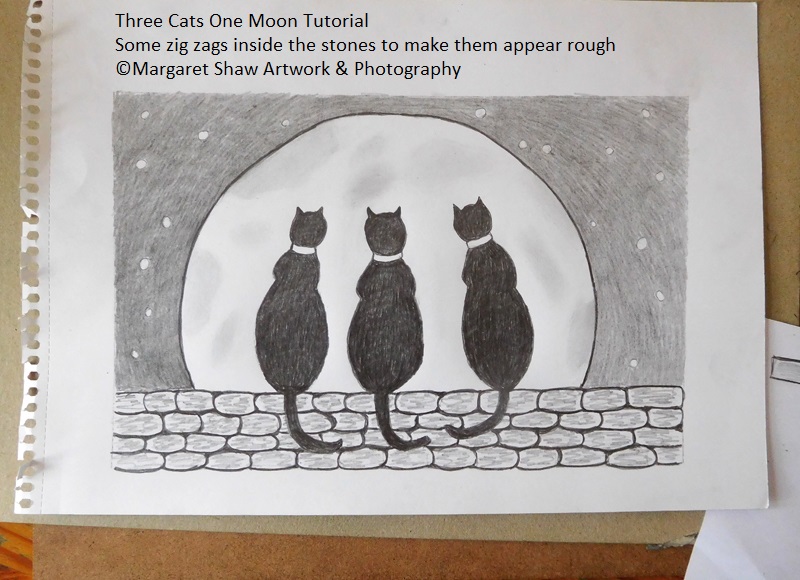
Now put some zig zag lines in the stones to make them appear rough.

Once all complete have a review. Are there any whites that need to have smudges remove ( back to that clean eraser ) and are there any tones that need to be darkened?
I decided to darken my sky some more with another layer of pencil and tided up the edges of the cats.
Once you’re happy sign your work. I decided to sign on the bottom right.

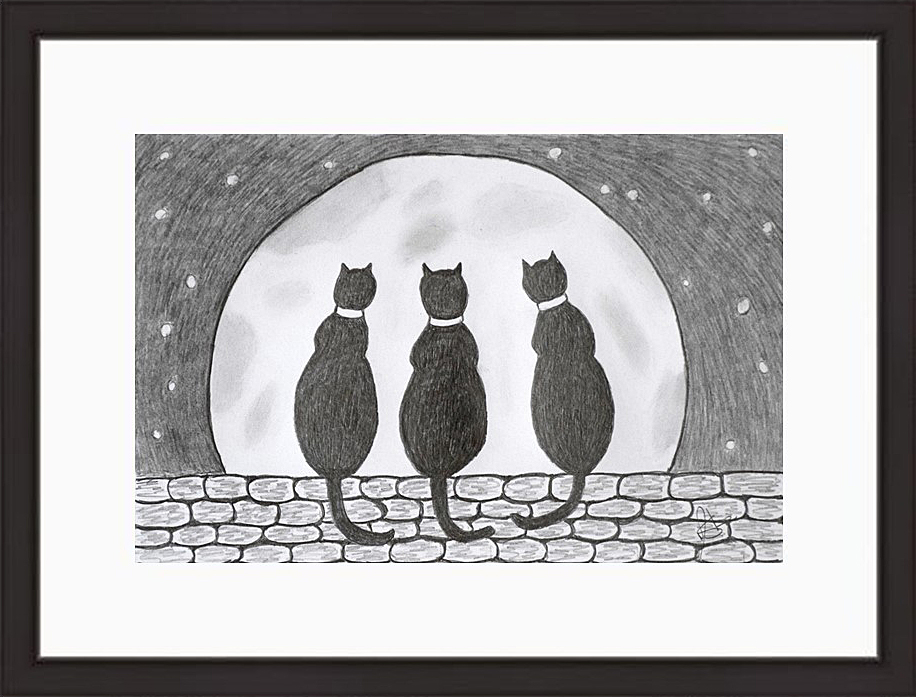
If you’re pleased with what you’ve done its quite amazing what a mount and frame can do for a piece of artwork.
A4 is a standard size and you should be able to buy a mount and frame without much difficulty.