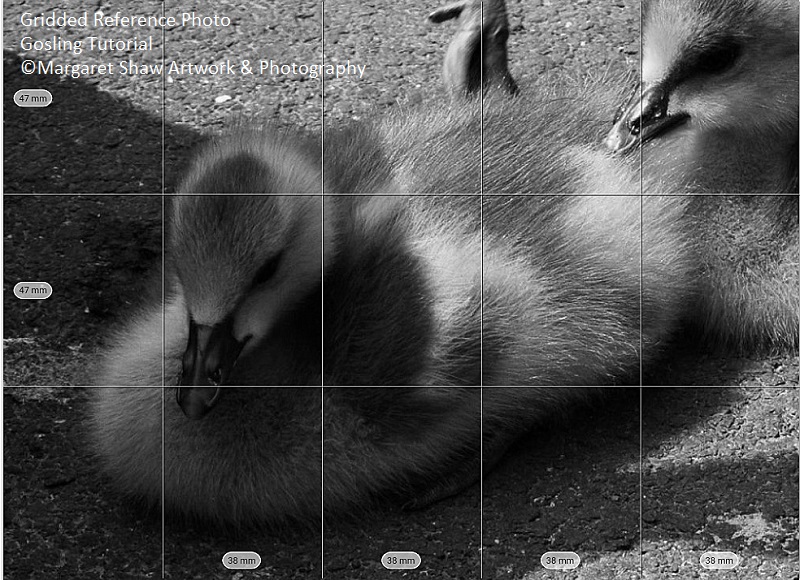
Here’s the photo that we’re going to work from. To help with the drawing I’ve made the image monochrome using photoshop.
You’ll see a grid on the photo which is showing how the image will fit into a rectangle 19cm x 14 cm. This has been done using the Art Grid app on a tablet. You load an image into the app, tell it what size of paper you’re working on, crop the photo to fit the paper and the app works out the measurements.

We’re going to work on A4 paper as that’s a common size but we’re going to draw a rectangle in the middle of the paper measuring 19cm x 14cm. This will mean that if you’re pleased with your drawing and want to keep it a 10 x 8 inch standard mount with a 1 inch surround will give you the right aperture to show your work. In the 19cm x 14 cm rectangle there are 3 columns horizontally each measuring 47mm and 5 columns vertically each measuring 38 mm
Mark out the grid on your paper as described. Don’t be heavy handed with the grid lines as you’ll want to remove the marks as we start to fill the outline the drawing.
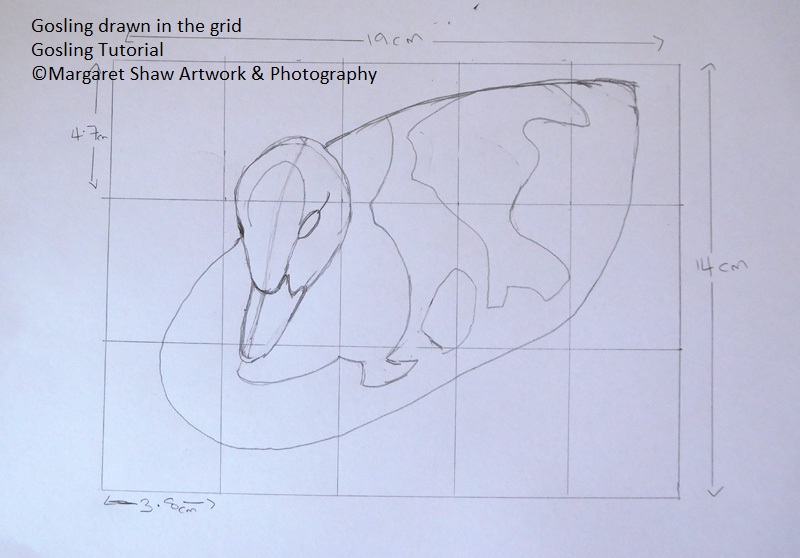
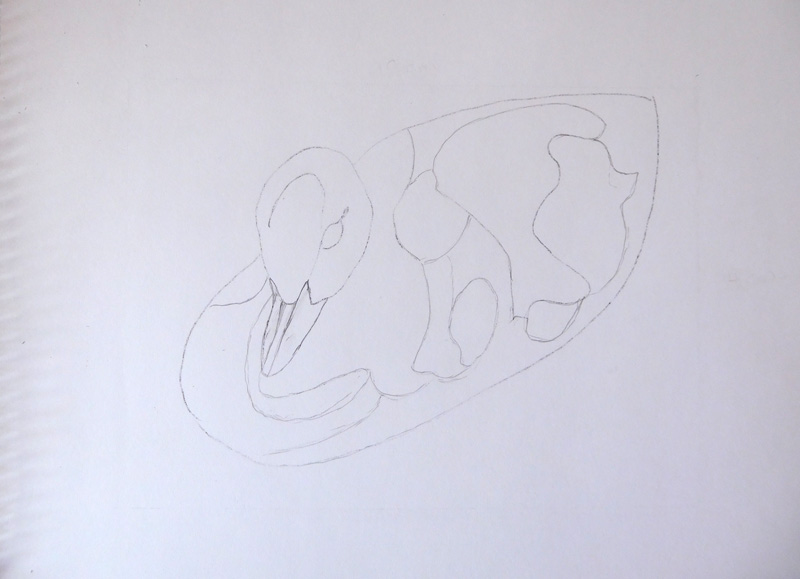
Using the grid as a guide draw the outlines of the gosling. You’ll need to be fairly accurate or else the gosling may look a little odd. We’re not going to draw the head of the 2nd gosling so just join the tail at the back.
Don’t draw the outlines to heavily. If you make a mistake you can erase them.
At this stage you’re also marking out the darker toned areas on the gosling.
Because the head is offset we can see more of the right side of the face, so I’ve drawn a line up the head from the tip of the beak just so that we keep the top of the head and the centre of the beak in place.
If you’re not happy with a line, then draw in the new line before erasing the old one. Experience has shown that if you erase the incorrect line first you’re likely to re-draw it exactly the same way.
I sometimes find it helpful to drawn on the reference image to give myself a feel for where things are going. Here's the link to the reference photo that you can download and print on an A4 piece of paper.
I’ve also provided the outline drawing for download and A4 print so you can trace it. By tracing something you are still drawing and with more experience you’ll trace less and less.
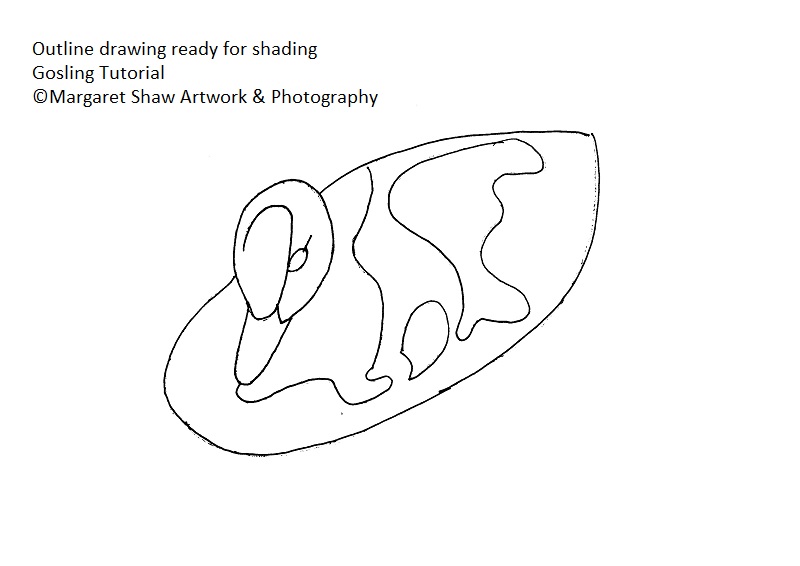
The next stage is to remove the grid lines so you have the gosling to fill in (I did say don’t be heavy handed with the grid). If you have been heavy handed with the grid – trace your drawing and transfer it onto a fresh piece of paper.
This example image has been inked so it would scan and print well.
You’re now going to add a few more marks to show the mid tones and the lighter tones on the body.
Also you’ll see that the beak islighter in the middle. Starting quite narrow at the tip of the beak and widening slightly where the beak joins the head at the top.

Before we start to fill in the picture, a little practice. We need to be able to create a range of tones with our pencil.
On a spare piece of paper draw a grid (mine’s 1cm squares). Then see how many tones you can get from your pencil. Use the lightest touch to draw the lightest grid and at the other end press on hard to get the darkest grid

Here’s my attempt – not too many tones but enough to give me a range.
If you have pencils with different leads than you can get a wider range. H pencils give the lightest tones and B pencils give the darkest tones. But, as with this exercise, you can get a range with just the one pencil.

To help throughout your drawing, I suggest you view on screen or download / print the finished piece and/or the reference photo and keep referring to them. A saying I try to abide by – look three times and drawn once.

Whilst you are working I suggest you have a piece of paper that you can use to cover your completed areas so you won’t smudge them.
If you do get a few smudge marks – rub them out.
It’s also an idea to have a practice piece of paper available to give things a try before committing to the finished piece.
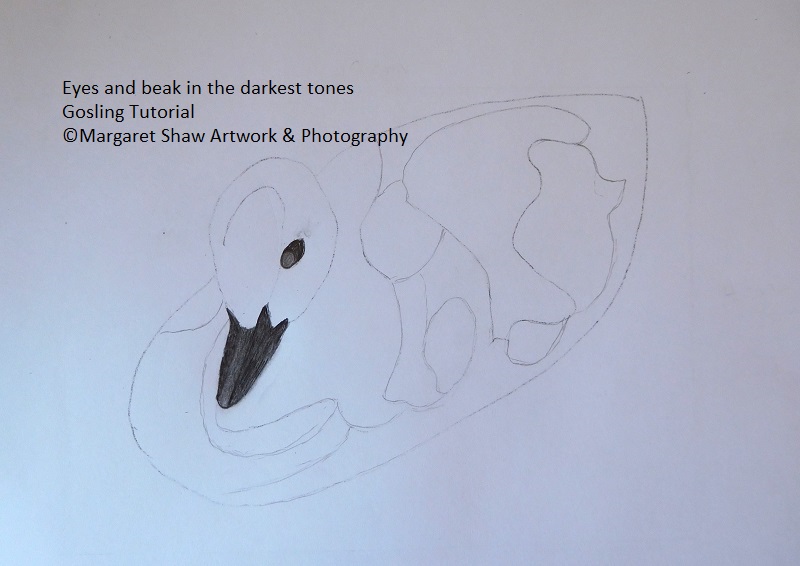
You’re setting off with the 2 darkest tones, the eye and the beak.
The gosling is looking down so the eyeball is at the front of the eye. Mark in a small circle (about 1/3rd of the full eye – better to do it too big as it’s easier to put in more dark than do it to small and find yourself trying to erase a small area).
Then pressing the pencil, hard fill in the back of the eye and some “eyeliner “round the front.
If you’re happy with the size of the eyeball fill that in but ensure that the tone is lighter than your dark.
Onto the beak - same technique -complete the dark areas at the edges and then a lighter tone in the middle. You don’t really want a harsh stripe in the middle of the beak so rub your little finger up and down the beak and that should blend the 2 areas together.
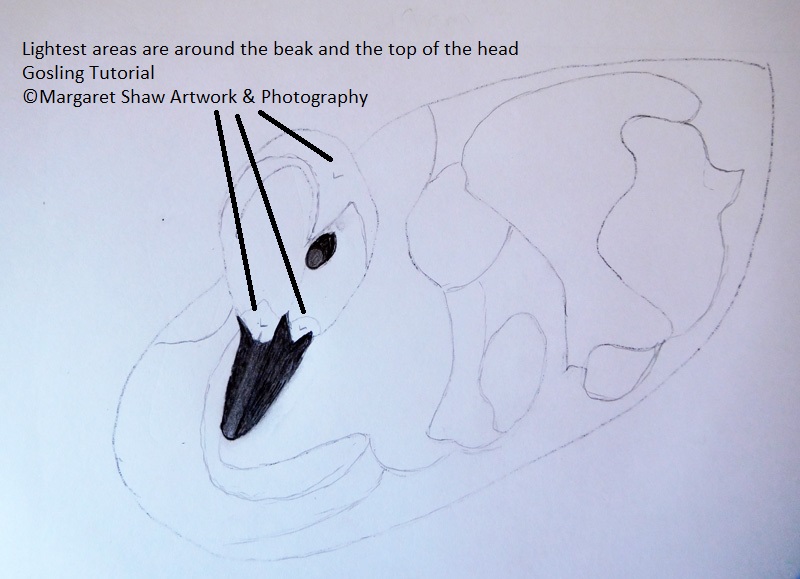
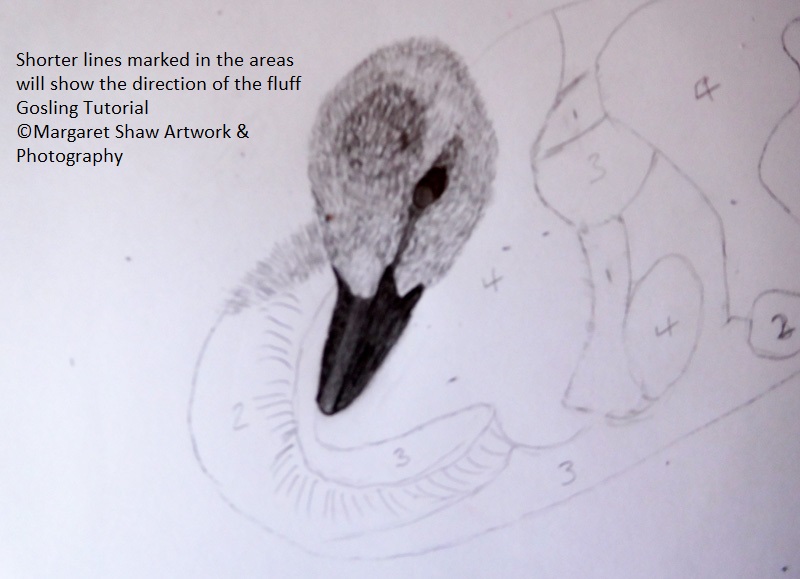
You’re going to work the gosling in sections, starting with the head. Look at the reference or the finished piece, you can see the lightest areas are round the beak and the top of the head.
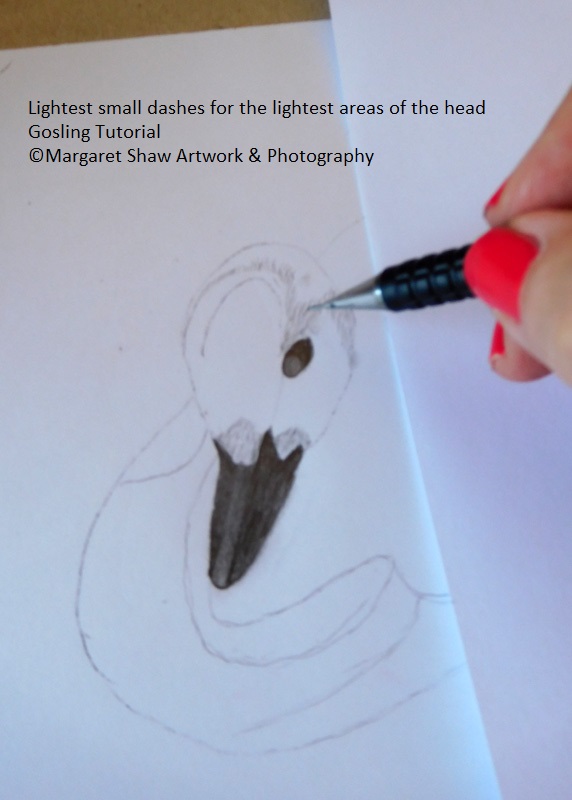
Using the lightest of touches with the pencil – small dashes running in the direction of the fluff. When you get to the edge of the head carefully erase your drawing line and replace it with little dashes.
You may need to have your spare piece of paper to cover the body of the gosling so you don’t mark the drawing or any of the white paper.
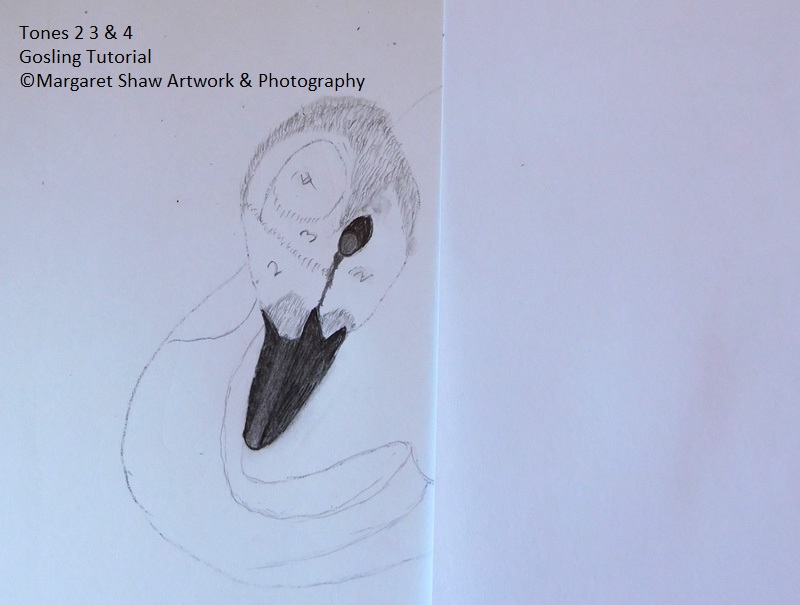
Once the light areas are shaded then mark out tones 2, 3 & 4.
2 - 2nd lightest one under the eye and across the mid of the head.
3 - 2nd darkest tone an area around the top of the head
4 darkest tone the top of the head.
Using the same small dashes fill in pressing the pencil a little harder from 2 up to 4.
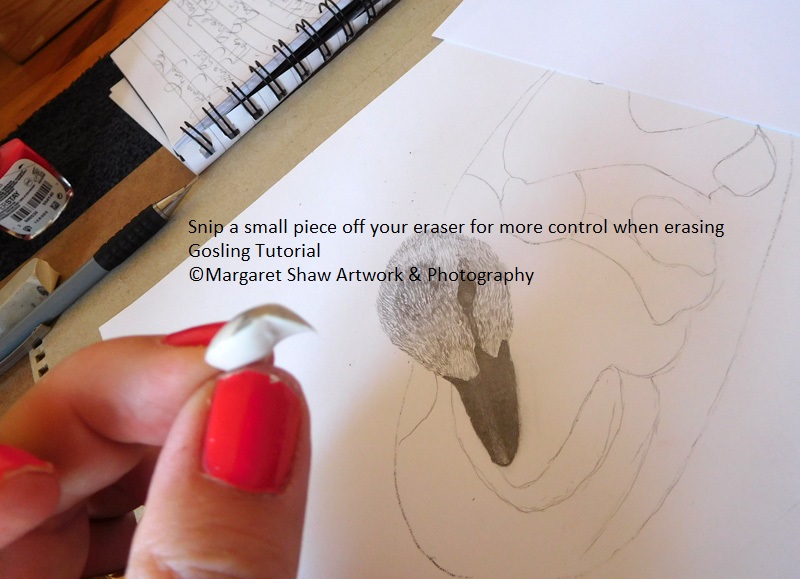
You may see your outline marks or have a obvious line from one area to another. Chop a small piece off your eraser and gently rub away the lines in the direction of the fluff. If you erase along the line you may find that difficult to cover up. Then back in with the pencil to put a more blended fluff back in.
There’s also very dark areas above the eye and leading from the eye to the beak.
See completed head below.
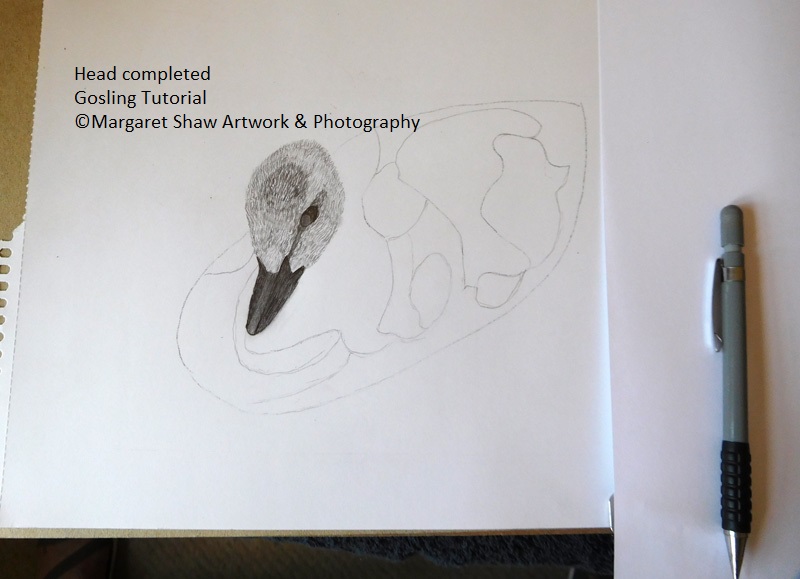
Once you’re happy with the head then it’s onto the body. As I am right handed I work from left to right to help avoid smudging work already done. If you’re left handed you may want to work from right to left
If you’ve not had a break – maybe time for a drink? You can leave your pencil drawing for as long as you like – pencils don’t go off if left. So nothing to spoil unless another family member decides they’d like to help!!
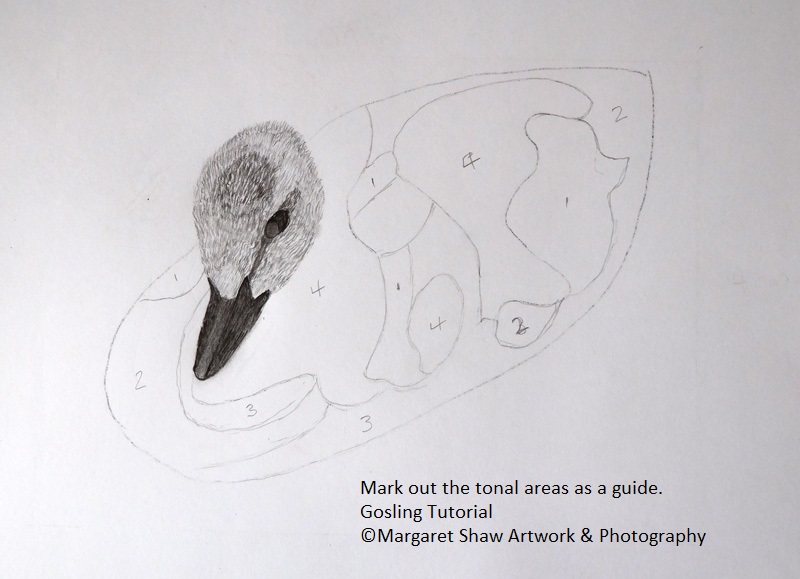
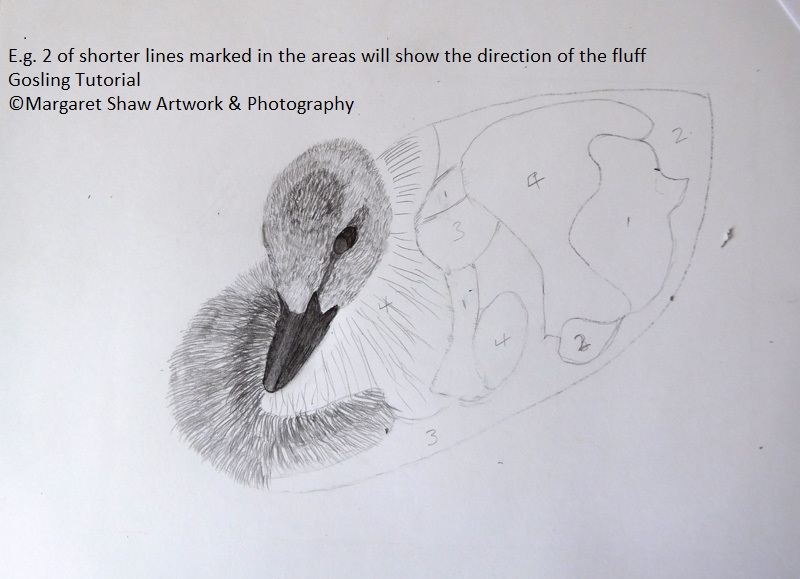
Using the same principle as the head mark out the 4 tonal areas on the body
through 1 the lightest to 2 & 3 and 4 the darkest.
You don't need to be exact with the markings but you do need a range of tonal values.
Hints and Tips - Please read before starting work on the body areas.
The body fluff is a little longer than that on the head.
The line strokes are going to create the shape of the body so do look carefully at the direction of each area.
Reminder again to follow the reference or the finished piece.
Keep in view no harsh lines between the tones.
As you start to fill an area in, draw a few broken lines so you can see where the lines change direction.
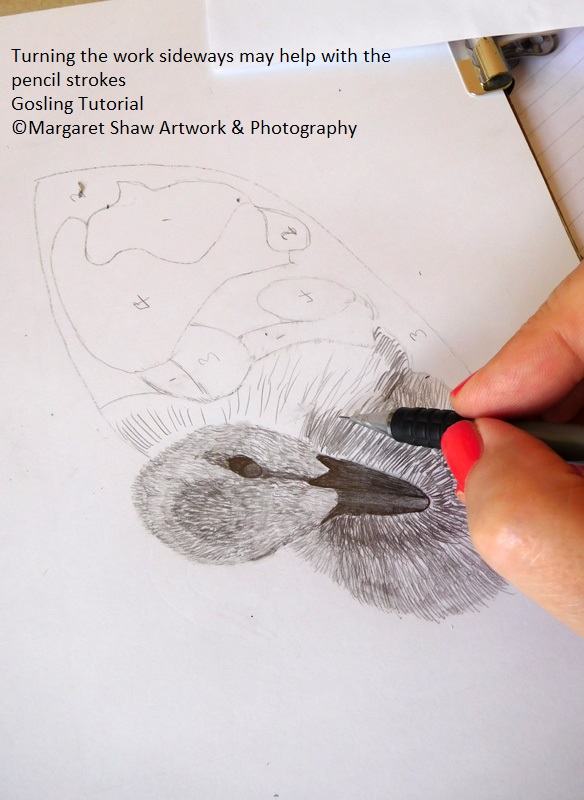
I’ll quite often turn the work on its side for ease of working and flicking the strokes.
If you do your strokes both ways i.e. top to bottom and bottom to top you’ll find that
the marks become more random and are less likely to create stripes between the tonal areas.
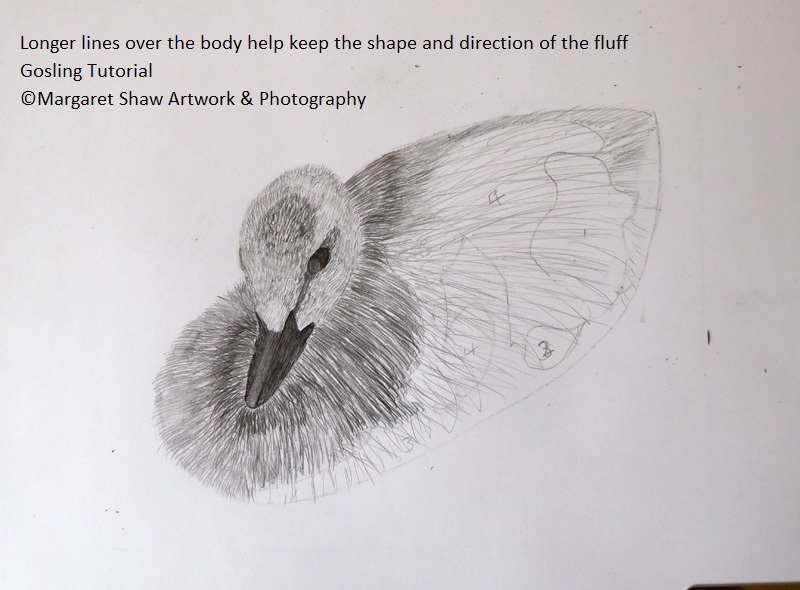
You may find it easier to draw some long lines to get the shape of the body
They will disappear as you put the shorter strokes in.
Any erasing, do in the direction of the fluff, as if you go across the fluff the eraser lines may be hard to cover up
If the eraser gets dirty – clean the eraser by rubbing on a blank piece of paper.
Once I’d finished the body I noticed that you can just about see the left eye
– this just needs to be a gentle, narrow line curving along the head level with the already drawn eye.
Do not spoil your work by putting this in if it doesn’t look right.
I also put a very fine outline between the head and the body.
Have a look at the finished piece
So that's the end of the hints and tips - you're ready to complete the body.
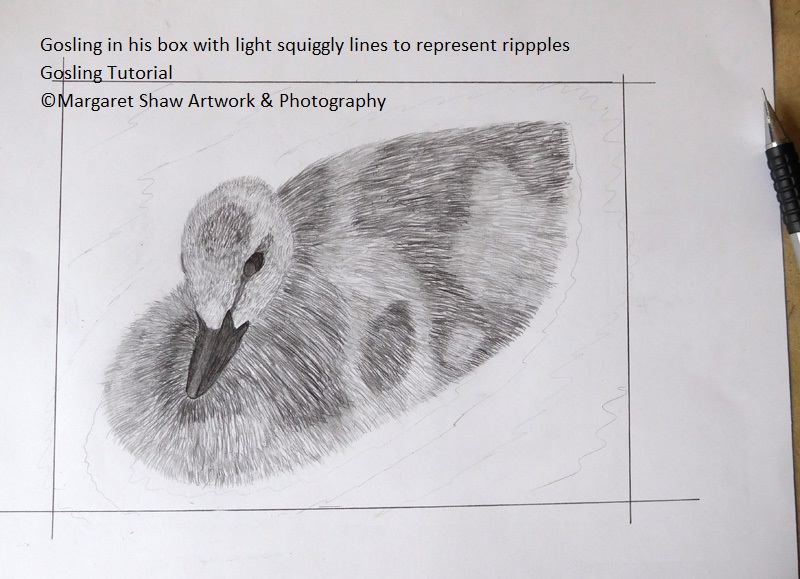
Onto the background. At the moment the gosling is floating in mid air so you need to ground him. The A4 paper is too big so you need to drawn in the box. I’ve done this slightly bigger than the 19 x 14 cm so If I decide on a small mount it won’t show.
I decided that my gosling could be floating on water. Initially I drew some in some squiggly lines following his shape to represent ripples. If you like this idea then maybe make the lines a little darker and thicker than I have.
Alternatively look at the reference photo and put a shadow under him – shade the area in quite darkly and rub into the paper to get a nice blended finish.
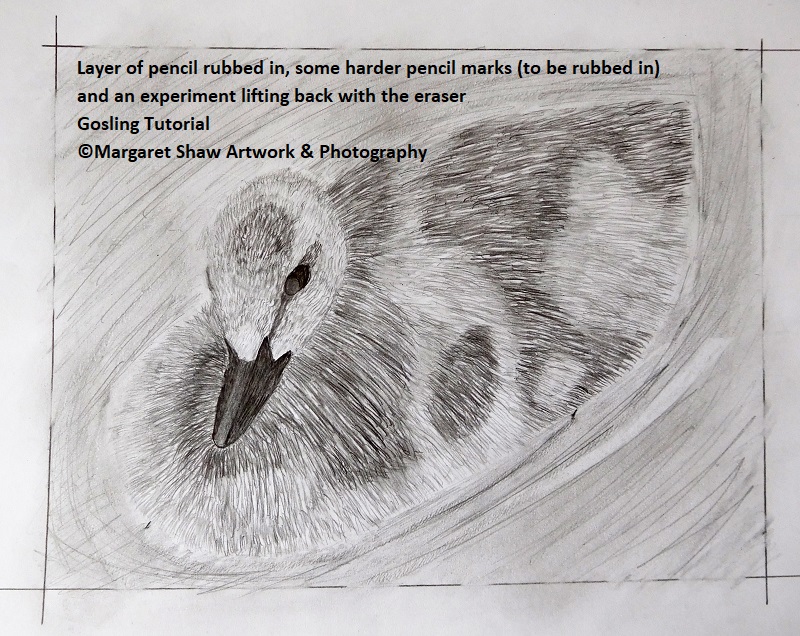
I have to admit at this point to having a pen incident when I marked the paper by accident. I don’t need anyone to help me mess my work up.
So to cover this up I shaded in the area surrounding the gosling following his outline shape and rubbed the pencil into the paper. I then used a combination of slightly heavier shading in lines and some lifting of areas with the eraser and rubbing the paper again to create a random pattern.
I did this a few times until I got an effect I was happy with which I think looks a bit like the surface of a pond – have a go on your spare piece of paper before working on your image – I’d hate you to spoil your work at this stage.

Time now to sit back from the picture and see if there are any tweaks required – I decided yes:
I made the eye ball smaller and rounder by more darkness around the eyeball
I placed a little highlight at the back of the eye by careful lifting out with the eraser (you can always put the dark back in but do be careful)
I squared the tip of the beak.
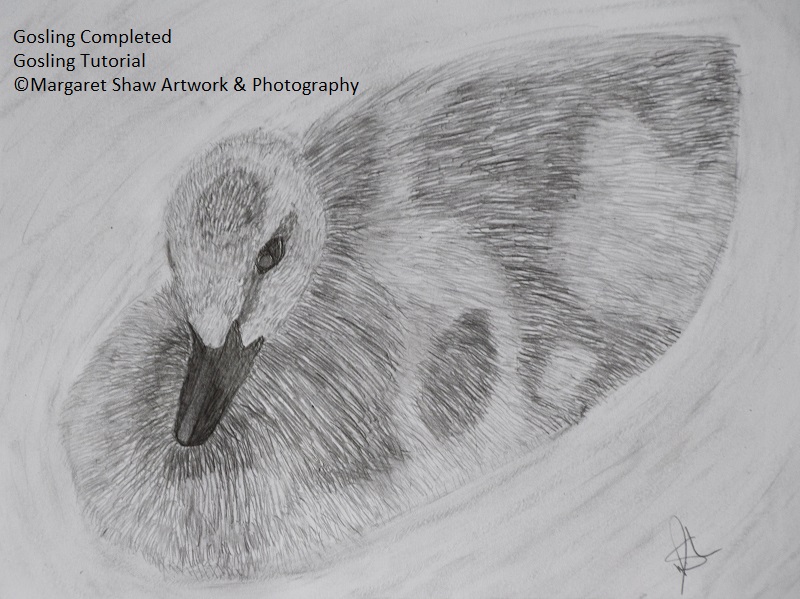
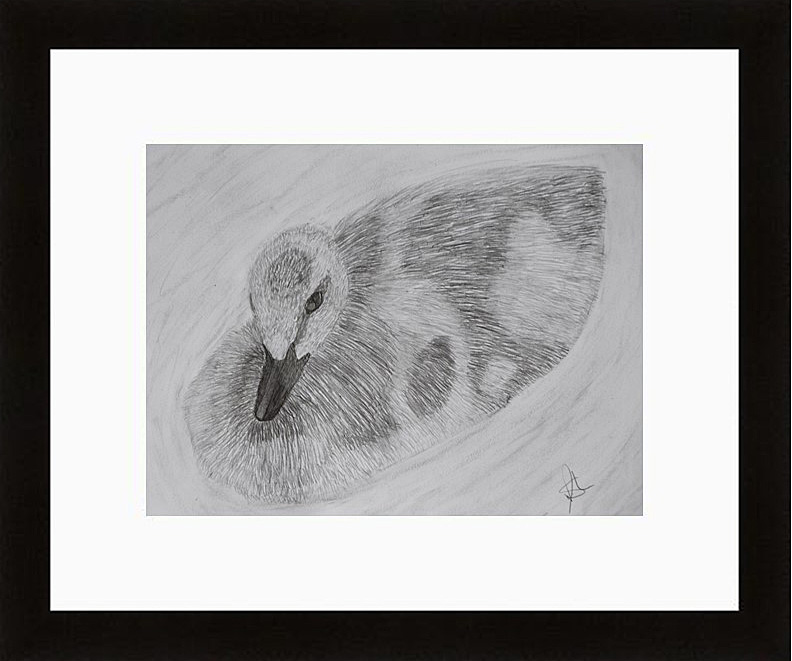
Once you’re happy sign your work
I decided to sign on the bottom right.
If you’re pleased with what you’ve done its quite amazing what a mount and frame can do for a piece of artwork.
As explained earlier this gosling will fit into a standard10 x 8 mount / frame which you should be able to buy without much difficulty.